Replacing the Rim of an Antique Great (Walking) Wheel
- Nov 7, 2025
- 4 min read
Bob Roemer
11/7/2025
Great or “walking” wheels are one of the earliest forms of spinning wheel, dating back to the 14th Century in Britain and used extensively in the US during colonial times. They were generally augmented by the treadle wheel by the mid eighteenth century. Most great wheels today are antique unless built by commission. Consequently, it is important to preserve and restore them, particularly if they are to be used for spinning.
The Challenge
While setting up our disassembled antique great wheel, the wheel fell over and shattered the brittle pine rim. The rim wasn’t salvageable, so the decision was to replace the rim or dispose of the entire great wheel assembly. The rest of the wheel, base, legs, accelerating head and spindle were in very good shape. Consequently, with some trepidation, we decided to attempt replacement. Familiar with making wooden boats and slat-backed chairs, I had steam-bent wood and the very thin rim didn’t seem too difficult.
The Condition of the Broken Rim


Selecting and Preparing the New Rim Material
The replacement pine was very carefully selected to assure that it was clear and had very straight grain. The length of each of the semicircular pieces were determined (½ circumference + about 8” overlap) and the 2 sections were cut to size, in our case ¼” x 3”. The ends were tapered for 8 inches with a bench plane to form the scarfed connection.

Forming the Rim
My steam box is too short to accommodate 7’ pieces; I soaked the rim pieces, simply submerging the strips in a stream for 3 days, which left them sufficiently pliable to form the 2’ radius for the rim. I’m sure a water-filled section of roof gutter would work at least as well.
The base for the mold for the rim was a piece of ¾” plywood with vertical supports screwed at the inside radius of the rim. I selected the flattest possible plywood since this would establish the plane of the rim and the alignment of the drive string. It wasn’t necessary to have a continuous mold since the thin rim should bend easily and uniformly. I scribed the inside radius of the rim on the plywood and screwed “L”-shaped supports from 2”x4” stock, equally spaced every 30o (for 12-spoke spacing), chamfered on the outside vertical to the plywood, each with 2 screws to preclude twisting then the strips were bent against them.


I clamped one scarf joint with two clamps and temporary 1” x 2” shims. Then bent the rim over the form starting with the clamped scarf joint and worked around in both directions to the open join. It was important to have good clamping at the joints, but as much open to the air as possible to help drying.

I let the rim remain on the form for 3 full days in a relatively warm (65o F) environment before gluing one scarf joint.
Gluing the Scarf Joints
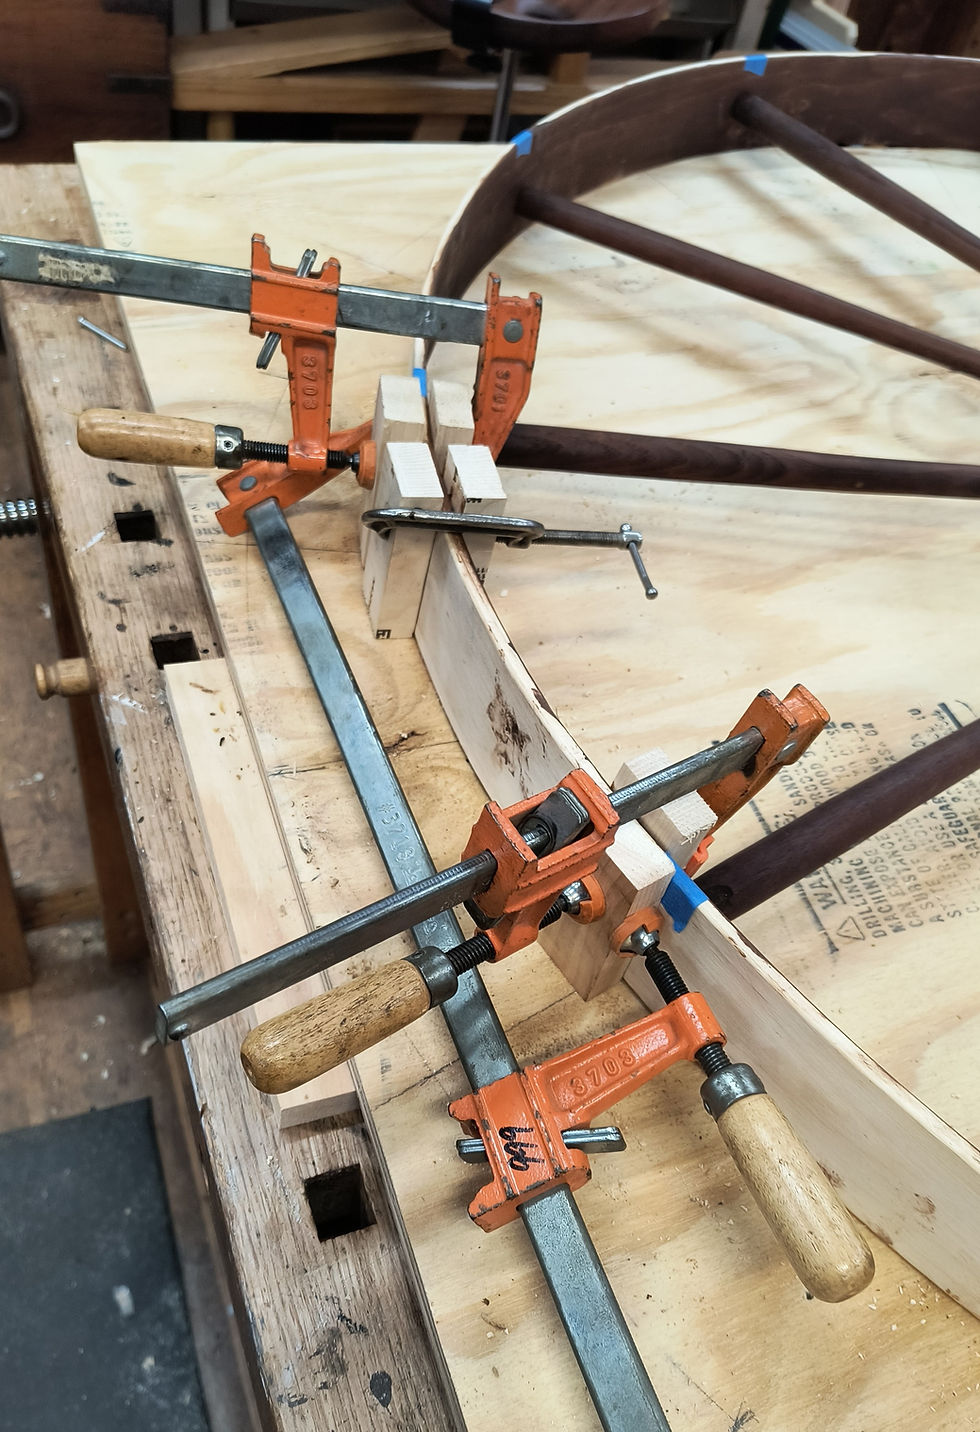
I cut curved clamping jaws with the radius of the rim from 3” x 3” x 8 ½” and lined the clamping surfaces with ¼” cork sheet to accommodate thickness variations at the scarf joint. I taped the area where I didn’t want glue since I would eventually stain the rim.


Preparing the Hub & Spokes
Some spokes were loose in the hub. I glued them back with a jig to make sure they were the same distance from the post and made sure they’re fully seated and the same length from the hub.

Assembling the Entire Wheel
I set the hub and spoke assembly into the bent rim, still on the mold and carefully marked the points on the rim where the spokes would be nailed. The unglued scarf joint had to be loosened to set all the spokes in.

I used a set-up a jig to assure the spoke ends are in the middle of the rim when they’re nailed. Spoke end diameters vary, hence the “V” to assure centering.


I then carefully pre-drilled and nailed the ends of spokes through the rim. I used the old style blued ring-necked drywall nails to assure they remained tight and didn’t pull through the rim.
I pulled together the unglued scarp joint and glue by clamping pieces at either end of the scarf joint and pulling the ends snugly together around all of the spoke ends. I then glued the remaining scarf joint using the same cork-faced clamp jaws made for the first glued joint.


The timing-focused Sermorelin article does a nice job breaking down a topic that’s often overlooked. Atlas Men’s Health explains the reasoning behind evening dosing in a simple, easy-to-understand way. I like that the guidance feels realistic and adaptable to different lifestyles. It reinforces the idea that small adjustments can make a big difference over time. Definitely a useful read if you’re aiming for better results.
https://atlasmenshealth.com/blog/when-is-the-best-time-to-take-sermorelin-for-maximum-results